
Country Lifestyles
[AgriLife Today] Expert: Spring right time to ‘chill-out’ with food safety

By: Paul Schattenberg
Make cleaning fridge part of spring cleaning ritual
KERRVILLE – As the “home” for raw and cooked foods, the refrigerator is both a useful and vital appliance that must be kept clean to reduce the risk of foodborne illness, said a Texas A&M AgriLife Extension Service expert.
With spring just around the corner, now is the perfect time to be thinking about cleaning the refrigerator and making it as safe as possible for food storage, said Rebecca Dittmar, Agrilife Extension program food safety management specialist based in Kerrville.
A National Sanitation Foundation study in which microbiologists measured levels of yeast, mold, staph and coliform bacteria — the family that includes salmonella and E coli – determined the kitchen was the “germiest” room in the house. It was also the room with the most coliform bacteria.
“Bacteria was found on multiple surfaces, including sponges, sinks, countertops and cutting boards,” Dittmar said. “This really drives home the need to keep kitchen surfaces, including refrigerator surfaces, as free from bacteria as possible,” Dittmar said.
But cleaning the fridge isn’t as simple as cleaning other areas of the kitchen, she noted.
“First of all, harsh chemicals and disinfectants like bleach shouldn’t be used to clean surfaces where you will be putting food,” she said. “Disinfectants that come into contact with food could make you sick due to the strong chemicals they contain. It’s best to use hot, soapy water to clean the refrigerator — or use specially formulated products or natural cleaners.”
According to the U.S. Department of Agriculture’s Food Safety and Inspection Service, the two families of bacteria that can be found in refrigerators are pathogenic bacteria, which cause foodborne illness, and spoilage bacteria, which cause foods to deteriorate and develop unpleasant odors, tastes, and textures.
“This is a good time to use or throw away foods that are close to reaching their expiration date or spoiling,” she said. “Obviously, before cleaning the interior of the fridge you’ll want remove all the food. An empty fridge makes cleaning easier and pretty much eliminates the possibility of contamination.
“Take out all the removable parts, such as shelves and drawers and put these in the sink to soak with warm water and regular dishwashing soap before rinsing and drying. You may want to let any glass or ceramic pieces warm up a bit before putting them in hot water to avoid their cracking or breaking from ‘thermal shock.’”
Dittmar suggested wiping the interior surface area with commercial wipes or dishwashing soap and warm water, working from top to bottom to avoid drips onto clean surfaces.
“Use a dishcloth or a paper towel when cleaning,” she said. “To remove tough stains, mix some baking soda with water to make a paste and apply it to the stain and let it sit for a while before scrubbing and wiping it off. For thick or sticky spills, you may want to put a warm, wet cloth over the spill for a few minutes to soften them and make them easier to remove. If you used the dishcloth to wipe up raw meat or juices, wash it or replace it immediately with a clean one.”
She said while cleaning pay particular attention to any corners, cracks and crevices where spills and small particles of food typically collect, and remember to wipe down interior doors.
“Once the interior is clean, it’s time to put the food back into the refrigerator,” Dittmar said. “Make sure the interior temperature is set to keep foods below 40 degrees Fahrenheit. Once the fridge is clean, commit to take extra measures to keep it that way. Regularly look for hidden spills and wipe up any new spills immediately. Remove any foods that produce lingering odors, and to keep the fridge smelling fresh, put an open box of baking soda on one of the shelves.”
She said this is also a good time to start developing the habit of each week throwing out perishable foods that should no longer be eaten.
“A general rule of thumb for refrigerator storage for cooked leftovers is four days,” she said. “If food is past its ‘use by’ date, it’s usually best to discard it. If you’re not sure or if the food looks questionable, the maxim ‘When in doubt, throw it out’ is a good way to go.”
For more specific guidelines for the length of time certain foods should be kept in a refrigerator, go to http://www.fsis.usda.gov/shared/PDF/Refrigeration_and_Food_Safety.pdf .
Dittmar said any food that looks or smells suspicious should be thrown out, and items such as ketchup and mayonnaise should be refrigerated after opening.
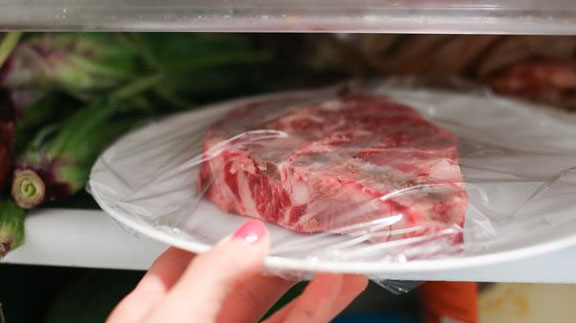
She also said raw meat, poultry and seafood should be kept in a sealed container or securely wrapped so their juices do not contaminate other foods. She said large amounts of foods such as stews or soups should be divided into smaller portions and put in containers for refrigeration, and the same for large portions of meat or poultry.
“When you’re returning foods to the fridge, this is also a good time to wipe any crust or sticky residue off jars or containers and dry them,” she said. “Food in the refrigerator should be covered to retain moisture and prevent it from picking up odors from other foods. And eggs should not be stored on the door of the fridge, but rather in their carton and on a shelf, as the door temperature is less consistent.”
-30-
LikeTweet
Find more stories, photos, videos and audio at http://today.agrilife.org

By Bryce Angell
Eleven teenage cowboys saddled up to hit the trail. If I’d have known what lay ahead I might have turned around to bail.
We’d planned our trip, so many nights, I’d say dang near a year. My cousin was the one in charge of all the food and gear.
We rode back in some twenty miles. The horses all but spent. Then set up camp and cooked the steaks inside our new cook tent.
The horses were all fenced in or were tied up for the night. ’Twas time to sit next to the fire. A well-deserved delight.
With bellies full of grub and sitting by the fire’s glow, Old Mother Nature made her call. Said, “Time for you to go!”
I quizzed my cousin, “Toilet Paper?” Desperate in my plea. I won’t forget his wide eyes if I live to ninety-three.
He said, “I plumb forgot about the toilet paper roll! Ya better start to gather leaves and dig yourself a hole.”
The frightful news sure traveled fast out to the young cowboys. They calculated lynching but were full of hot air noise.
So, we gathered leaves, then hurried off, the well-known, “Two Step Stride.” But all too soon the leaves were scratchy for our young backside.
My cousin said, “Just do your job then head down to the lake. But don’t forget your Ivory Soap and scrub for goodness sake!”
We were finally back to normal. No more scratchy, itchy seats. Compared to leaves and grass the Ivory Soap was hard to beat.
The youngest of the cowboys said, “Let’s contact Ivory Soap. We could be an advertisement for how we’d all lost hope.
“Then Ivory to the rescue. Now our cheeks are super clean.” Another cowboy hollered, “That would be a gruesome scene!”
So that night, while sleeping in my bag, I heard the loudest splash. I rolled on out then headed for the lake in one fast dash.
The sky was clear, the moon so bright, heard yodeling calls from Loons. But on that fateful night, I swear, I witnessed two full moons.
By NTFR Staff
By September, many North Texas gardens look tired. Tomato plants have slowed down, squash vines may have surrendered to insects, and the summer heat has worn on plants and gardeners alike.
The growing season may seem to be ending, but September can give you a second chance.
Fall vegetable gardens can be especially productive in Texas. Cooler weather eases heat stress, and several common garden pests become less of a problem as the season goes on. The key is choosing vegetables that can mature before winter and helping young plants survive the lingering heat of early fall.
Start by clearing out plants that have stopped producing. Throw away diseased or heavily insect-damaged plants instead of composting them. Healthy plant material can go in the compost pile, but discard weeds that have already gone to seed.
Once the bed is clear, loosen the soil and add a layer of finished compost. If you need fertilizer, base the amount on a soil test whenever possible. Garden soil should drain well, and most vegetables need at least eight hours of direct sun each day.
What you plant in September depends partly on the weather and where you live in North Texas. You can plant quick-growing vegetables such as radishes, turnips, mustard greens, lettuce and spinach from seed. Carrots and beets are also good fall crops, though they may take patience and steady moisture while they germinate.
Broccoli, cabbage and cauliflower are usually easier to establish from healthy transplants than from seed sown directly in the garden. Kale and collards can go in from seed or transplants. Garden centers often start stocking fall vegetable transplants as temperatures improve.
Texas A&M AgriLife Extension recommends planting fall vegetables early enough that they can grow and mature under good conditions. Texas has several growing regions, so check the planting dates for your area rather than a calendar meant for another part of the state.
September can still bring afternoon highs in the 90s, so new seeds and transplants need extra attention. Water the bed before planting, then keep the top layer of soil evenly moist while seeds germinate. A light layer of mulch can slow evaporation, but don’t lay it so thick that small seedlings can’t push through.
Transplants may benefit from temporary afternoon shade for their first several days in the garden. Shade cloth, an overturned nursery flat or another lightweight cover can protect tender leaves while the roots settle in. Leave room for air to move, and don’t let covers rest directly on the plants.
Succession planting can stretch your harvest. Instead of sowing every radish, lettuce or turnip seed at once, plant a small amount every week or two. You’re less likely to end up with more produce than your household can use at one time.
Keep frost in mind, too. Count backward from your area’s average first freeze and compare that window with the days to maturity on the seed packet. Cooler fall weather can slow growth, so give yourself extra time rather than waiting until the last possible planting date.
A fall garden doesn’t have to be large or complicated. One prepared bed, a few rows of greens and several broccoli or cabbage transplants can keep fresh vegetables coming long after the summer garden has faded.
September isn’t the end of the gardening year in North Texas. In many ways, it is a chance to begin again.
By Annette Bridges
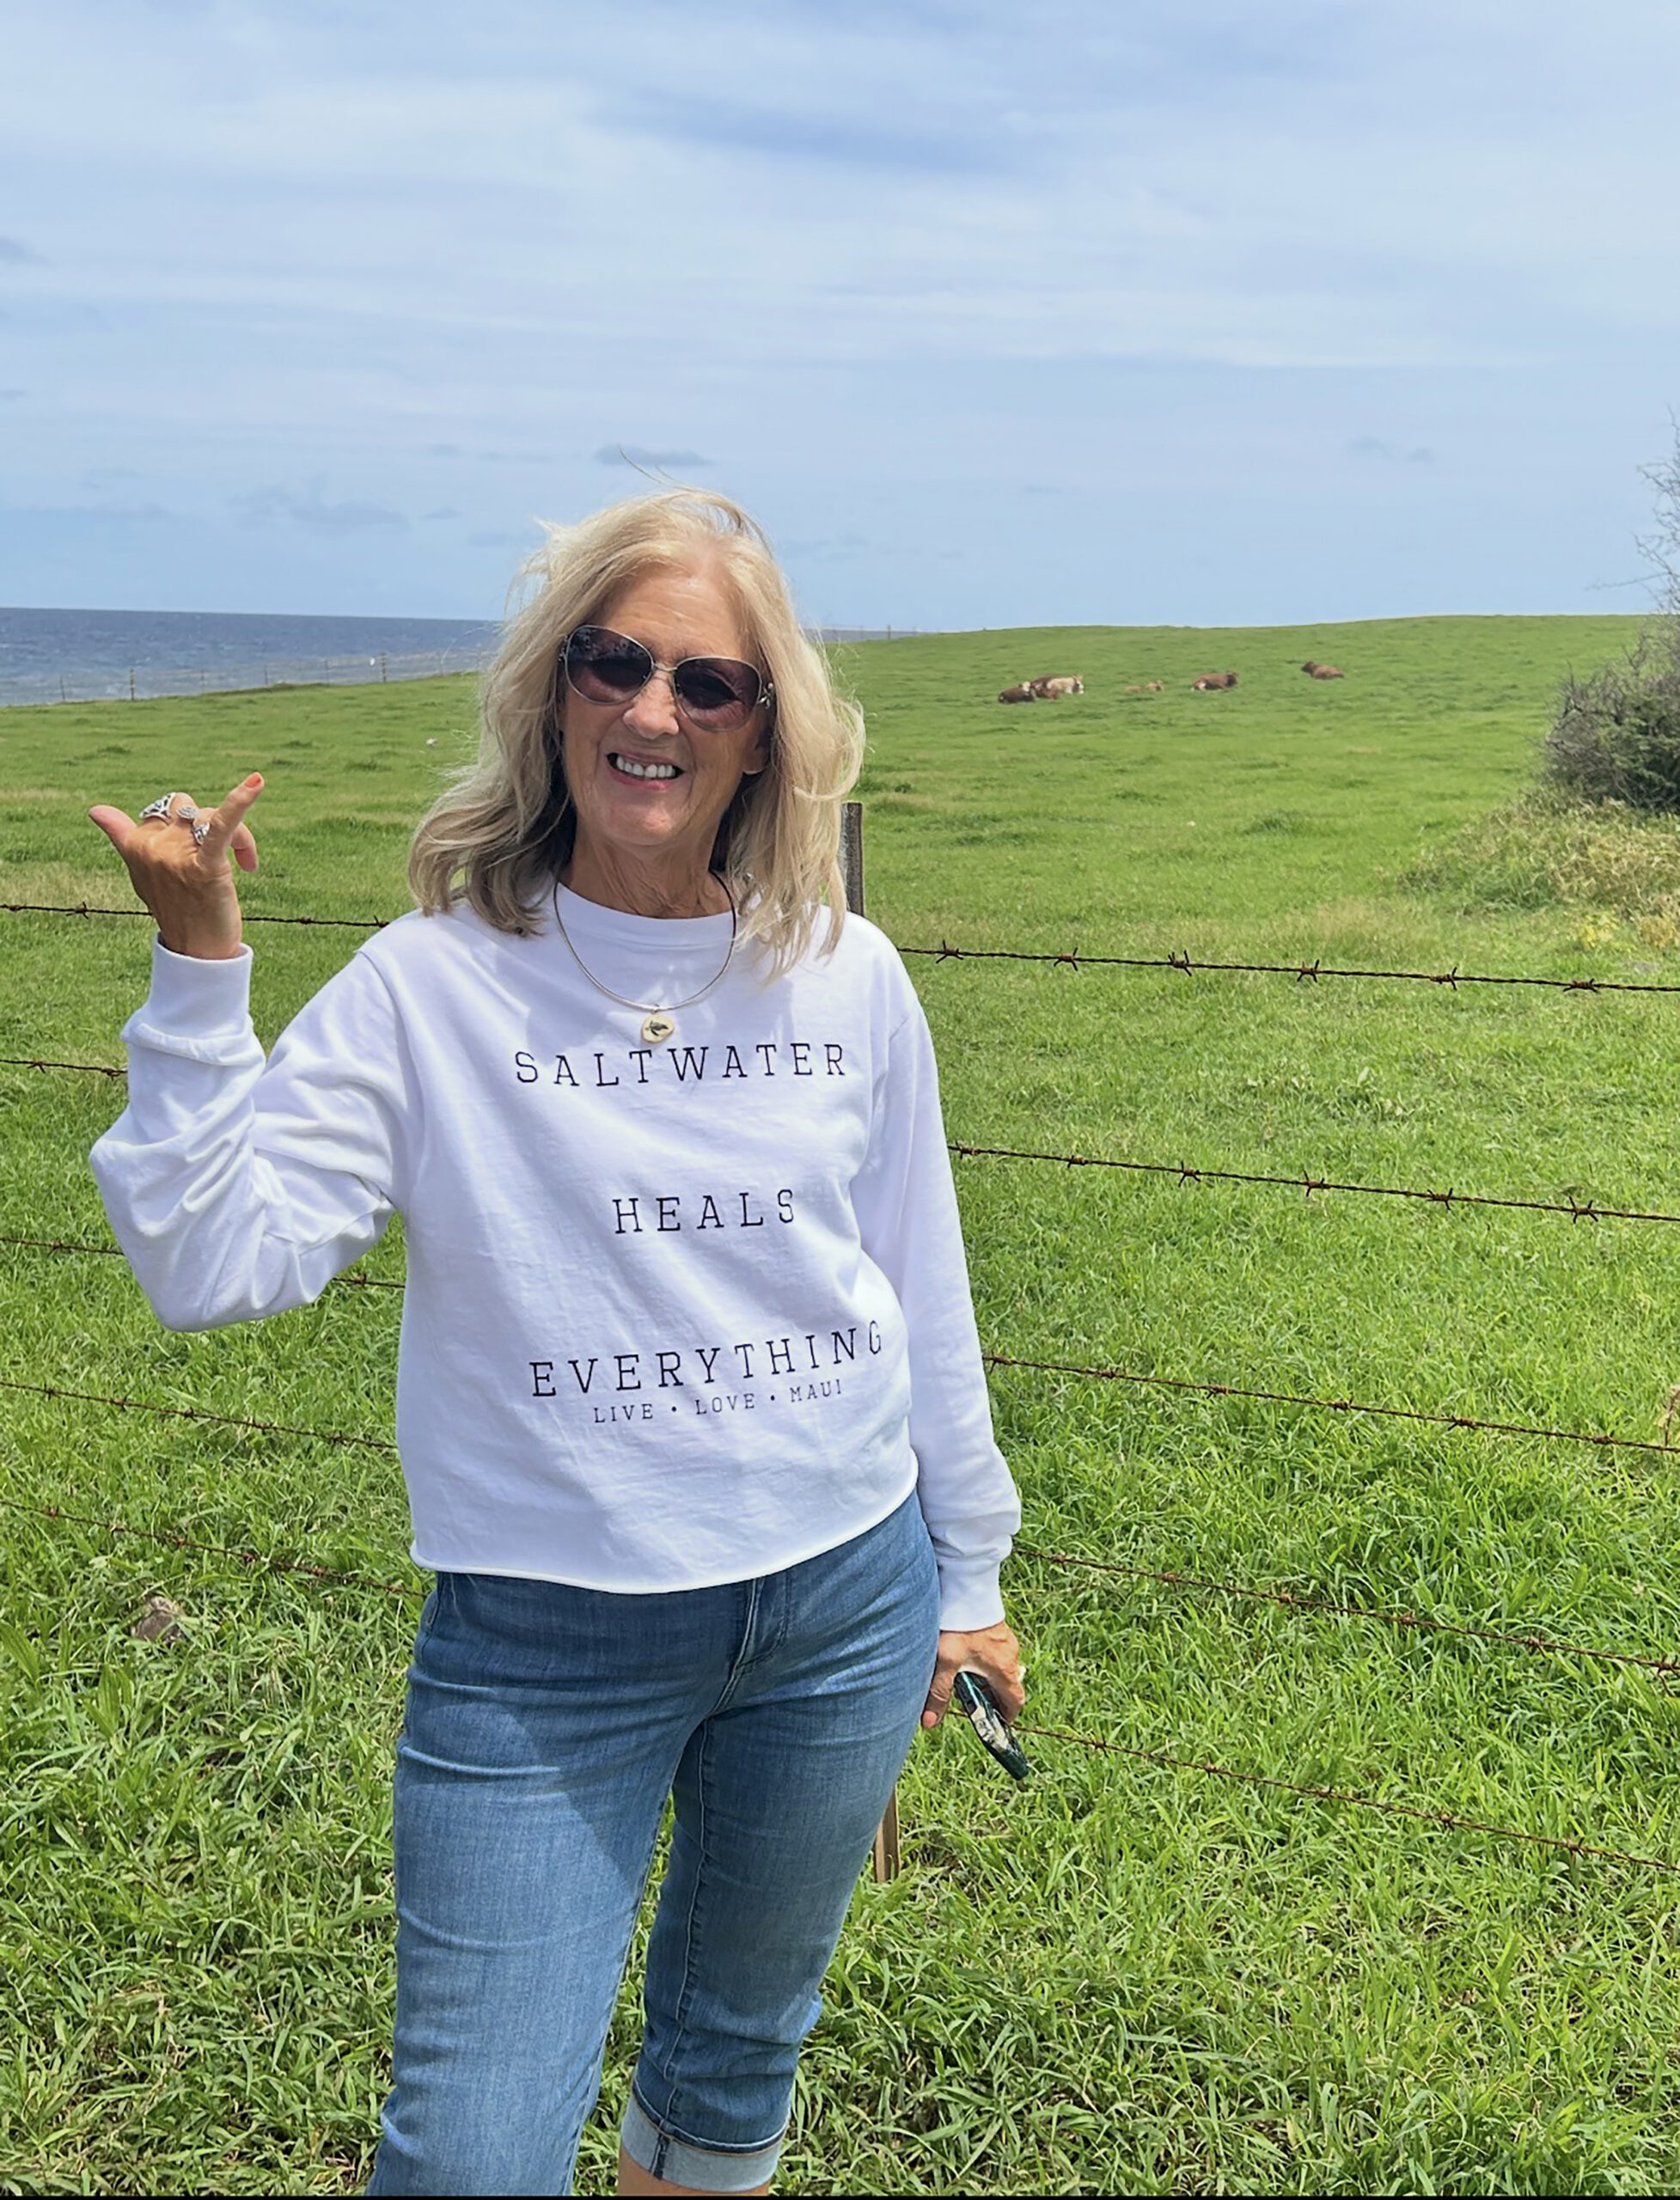
In September 2022, I wrote a column titled “Merry Maui Cows,” featuring a photograph of me with a group of Maui cows grazing in a seaside pasture.
This photo was taken in that same spot a few weeks ago, in March 2026.
Standing there again, looking out over that green hillside rolling toward the ocean, I couldn’t help but smile. I’m quite certain those cows were just as merry then as they are now, and I realized I am, too.
My husband and I had returned to Maui to celebrate our 45th wedding anniversary.
Forty-five years! I can hardly say it out loud without wondering where in the world the time has gone. The years flew by, and yet so much life happened in them: joys, challenges, ordinary days and unforgettable moments, the kind of life that shapes you.
This trip carried an extra layer of celebration for me. Since that first “Merry Maui Cows” photo, I’ve lost over fifty pounds. I found myself happily shopping for new tropical clothes, smiling in dressing rooms and picking up sizes I hadn’t worn in years. It was lighthearted fun, but it also meant something deeper to me. Change is still possible, even later in life.
At this stage of life, birthdays and anniversaries feel less like markers of time passing and more like invitations to look back, take stock and notice what has changed and what has stayed the same.
When I placed my new photo beside the one from 2022, I noticed the differences, of course. What stood out most was what hadn’t changed. I was still merry, and those two simple words felt like a quiet declaration.
Being “still merry” after years of life, with all its beauty and difficulty, says something. It says we’ve held onto joy and chosen gratitude. It says we’ve weathered what needed weathering and still found reasons to smile.
Life doesn’t stay the same, and it isn’t meant to. We get seasons of ease and seasons of challenge, moments that take your breath away and moments that take your strength. Through all of it, we can carry a steady thread of merriness forward.
It may be quiet, and life may be far from perfect, but I’m still merry. Maybe that’s enough. Maybe it’s everything.




-

 Country Lifestyles4 years ago
Scott & Stacey Schumacher: A Growth Mindset
-
 Country Lifestyles10 years ago
Style Your Profile – What your style cowboy hat says about you and new trends in 2017
-
 Horsefeathers12 years ago
Mount Scott: Country Humor with David Gregory
-
 Country Lifestyles10 years ago
June 2016 Profile – The man behind the mic: Bob Tallman
-
 Outdoor11 years ago
Buttercup or Primrose?
-
 Country Lifestyles10 years ago
December 2016 Profile, Rusty Riddle – The Riddle Way
-
 HOME10 years ago
Grazing North Texas – Wilman Lovegrass
-
 The Natural Horseman9 years ago
This is why we do what we do — RayeAnn and Cisco